
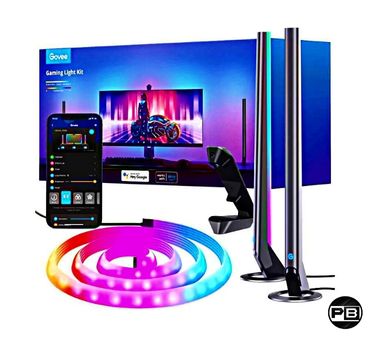
RGB lights are the main cause of the stunning looks of a gaming setup. Every gamer loves RGB lights whether it comes to RGB strips or Bars, it doesn’t really matter. What does matter is how stunning looks those lights are giving to your gaming room. So here am presenting you the best ever gaming lights package with legendary audio as well as scene syncing technology for your room by the brand Govee. The product is Govee DreamView G1 Pro Gaming Lights.
About Govee
A brand founded in 2017 by Eric Wu is now one of the most popular as well as rising brands that supplies LED lights as well as other light products to make your home smarter. The main motive of Govee is to make your life smarter than ever. In 2021, Govee became the monthly best seller in Walmart. In 2022, Govee collaborated with Stranger Things as well as later with Razer brand which is a well-known gaming brand in the US.
What Are G1 Pro Gaming Lights
The G1 Pro Gaming Lights is a full-fledged gaming lights package that can enhance your whole monitor as well as the desk setup. There is not just a single light bar or light strip but a whole package with a camera, 2 light bars, an RGB tube with mounting parts as well as a template to help you accurately mount the light. We will cover every single part of these amazing gaming lights in detail to help you understand exactly what these are and how these lights are perfect for your setup.
The Camera
The camera shows up with a power button, an audio port (headphone jack), a neon light strip port, a light bar port, and a power port. Just plug the power cable in the power port as well as every other thing like the neon light strip cable plus the light bars to make ensure that everything works by watching them light up. The camera itself plays the role of the hub to connect everything plus it has a built-in mic in it to sync the lights with the audio.
2 Light Bars
First of all, there are 2 light bars that are made up of plastic material with a dark grey metallic finish on them with a color-changing logo as well as the curved edges surfaces which make them look stunning. You have to place these lightbars 12 inches (30 cm) away from your monitor. Make sure to face the light bars to the wall, not completely but diagonally. They will work to enlighten the environment near the monitor.
RGB Tube Strip
This tube is very important to give your setup the look you always wanted. You have to mount this tube at the back of your monitor. You will also get mounting hardware to mount this tube easily at the back of your monitor. Moreover, You will get 5 straight mounting clips to prevent the tube from hanging by keeping it straight as well as stable and 4 corner mounting clips to give the tube a place to rest. It’s a piece of cake to install it.
How to install the RGB Tube
You will get a positioning template that you can use to easily position as well as mount the light tube. First of all, clean the back part of your monitor to make sure it is smooth as well as clean. Afterward, place the positioning template perfectly by aligning it with the edges of the back panel of your monitor. Afterward, remove the positioning template’s film cover to stick it to the back panel of the monitor.
Now for the main part, as I mentioned before, you will get mounting clips. Now you have to stick those mounting clips in the right place as on the template. There are empty spaces for the clips. On the top, there are 2 little spaces for the straight mounting clips with 4 spaces in the corner for the corner mounting clips.
You can stick the clips by peeling off the tape cover. Afterward, just attach each clip to each slot of the positioning template. If the corner clips are blocking the buttons or cable structure at the back of the monitor, you can use 2 straight mounting clips instead of corner clips. Place one vertically with the other one horizontally below it to make the structure like the corner clips. The larger side of the straight clips should be facing toward the center of the monitor. Be careful not to stick the straight clips in the wrong way.
Now you’ve finally stuck all the clips, remove the positioning template. Take the tube and place the textured side of the tube on the larger side of the clips. Remember to place the tube counterclockwise by starting with the clip located at the top center-left and then fitting the tube counterclockwise to the top center-right clip.
How To Install The Camera
You can easily mount the camera at the top center of your monitor from the back of it. You just have to peel off the cover and then just simply stick it on the top center of the back side of your monitor that leads the lens of the camera directly facing towards the screen which will help it to identify as well as sync the colors according to the scenes.
After installing the camera, just plug everything in the ports of the camera as I mentioned before, the camera has ports for, audio as headphones 3.5mm jack, a light tube, light bars & a power AC adapter port with a touch power button. You will also get a cable clip to better manage as well as to settle the cables of lights as well as the power adapter.
Moreover, you will get a headphone linking cable to sync the audio from the headphone device. You have to insert the longest part of the headphone cable into the audio port in the camera and the other shorter sections in the pc and in your headphones. This will make an audio connection between your headphones to the camera through which the camera can easily perform audio syncing.
How To Setup The Camera
Setting up the camera is simple, you will get some orange foam squares along with the product, which you have to stick on the corners as well as the edges of your screen, you can also stick them on the bottom, left & right center for detailed syncing. Afterward, you just have to download the Govee Home app from the Play Store Or The App Store. Open it, click the “+” icon, and search G1 Pro.
Now you just have to follow the instructions given by the app. First of all, you have to check the position of the light bars. Just click on the power icon that is situated on the lightbars on your phone screen. You can easily control the light bars from the Govee app on your phone.
After the light bars, now you have to let the app know about the positioning of your RGB tube. You just have to adjust the lights from your phone as it will be shown in the image above the adjustable slider on the app.
Now finally, you have to calibrate the camera. The app will show what the camera of the lights is looking like. You have to adjust the vision of the camera to the square foams you placed on the tv. Just drag the points on the square foam from your phone. Take your time in this as the more accurately you set up the reference points, the more accurately it will perform the scene syncing. To finish setting it up, just connect it to a 2.4 GHz frequency Wi-Fi connection. Only a 2.4GHz connection will work so make sure you’re not trying to make a connection with a 5 GHz connection.
Features Are In Your Hands
You have full control over the features of these lights. From which part of the light should work as well as with which color to controlling the full lights, you can control everything with just the Govee app. You can easily control both the lightbars as well as the RGB strip light behind your monitor independently. You can get a two-tone effect or even a rainbow effect by making several different colors on the lights that are brought to you by RGB ic tech.
Control Them According To Your Mood
There is a scene section in the app where are literally tons of features to control the lights. There are sections named life, festival, funny, emotion & game. Every single category has its own features in it. For example, in the life section, you will get features like leisure, dance parties, dining together, sports, technology, dynamic, dreamlike, blossom, adventure and even dating. These features control the lights with different animations.
Music Syncing
There is also a music section where the lights sync themself with the beats of the music. It’s like the lights are dancing and vibing with the music. You can even set the sensitivity of the music syncing with 3 features available party, dynamic & calm. The camera listens to the music with its mic or the audio source through the headphone jack.
Reactive Lights
Another astonishing feature in G1 Pro Gaming Lights is reactive lights which still shocks me as this feature can detect the lights on your tv screen and lights up the light bar as well as the strip light in a way that seems realistic. For example, if the left part of your TV screen is showing up with blue color and the other part is black, then the left light bar will also show blue color and the other light bar will show as black light. it literally syncs with the screen of your television. Thanks to the camera technology that Govee used to provide us with such stunning technology.
Remember, everything works by the camera so try not to get any other light reflection on the tv screen or the camera, it can even catch the big lights of your whole gaming room. So I recommend using these lights after turning the lights off.
Conclusion & Cost
There are tons of other features in these lights. These lights still shock me with the features it carries as well as with the easy installation. Govee really made our life smarter as well as simpler. This product is completely worth it to enhance your gaming setup. You can get your own Govee DreamView G1 Pro Gaming Lights for $170 (USD). It’s completely worth it just go for it.
You just read my article on these amazing lights to enhance your gaming setup. If you want more reviews related to helpful gaming gadgets and the latest gaming updates. Just enter the virtual gaming world by engaging with us at theplaybro.